Friday, 20 July 2012

How to Back Up Your Android Phone


How to Back Up Your Android Phone

Follow this guide to learn how to safeguard your smartphone's important data.

Just a few years ago, mobile phones were basic devices that could send and receive voice calls but not do much else. These days, smartphones are about as significant as full-fledged desktop PCs and laptops, and are filled with valuable email messages, contacts, videos, photos, and documents.
People depend on their smartphones every day, and losing the data those devices contain can be as disastrous as suffering through a hard-drive crash on a proper PC. That's why it's important that you back up your phone as regularly and carefully as you do your other devices.
Most major smartphone platforms can back up their data to a computer or to the Internet. In the event of a crash--which, for phones, could literally mean crashing onto the floor and shattering--the data can be easily restored when the device is repaired. Here are a couple of resources you can use with popular Android smartphones to ensure that all of your data is properly backed up.
Let Google Back Up Your Settings
Google's Android offers the ability to seamlessly save certain settings like wireless network preferences, bookmarks, and custom dictionary words to their servers using your Google account. To enable it:
  1. Go to Settings, Personal, Backup and reset, and select both Backup my data and Automatic restore.
  2. Go to Settings, Personal, Accounts & Sync, and select your Google account.
  3. Select all of the option boxes listed, to ensure that all available data is synced.
Though the specific procedure may slightly vary between Android devices, the process is generally the same. The above example is for Google Nexus S devices.
Back Up Additional Settings
For data that Google doesn't directly back up (such as SMS/MMS messages, playlists, and alarms), you can use third-party software. One popular choice is MyBackup Pro, which allows secure backups to remote servers or your own memory card, and automated scheduling.
The software isn't free (it costs $4.99), but you can try it free for a trial period to see whether it meets your needs. To begin backing up, simply download the MyBackup Pro app from the Android Market and then launch the app from your phone.
Back Up Pictures and Videos Manually
For your other important data, you can back up your smartphone to your computer manually.
  1. Connect your phone to your computer via a USB cable, and it will show up as an external hard drive. For Macs, you may need to first download a tool called Android File Transfer.
  2. Select the disk, and navigate to the DCIM folder. This folder contains your video and picture data.
  3. Select the data files that you want to back up, and drag them to an area on your computer, such as your desktop. The selected files will copy over to your computer.
Back Up Pictures, Music, and Videos Automatically
If the manual process above is too cumbersome, you can use third-party software to automate copying your smartphone data to your computer.
One popular method is to use AirSync from DoubleTwist, which will sync data between your computer (Mac or Windows) and your smartphone, similarly to the way iTunes works for iOS users. AirSync can also sync wirelessly over your network.
Another notable piece of software is The Missing Sync for Android--an all-in-one sync and backup program that is easy to use (and again offers wireless syncing), but has a higher price tag than other choices.
If these options don't appeal to you, consider signing up for free services like Google Music andPicasa, which make backing up your music, photos, and videos to their Internet services easy

Use Your Android Phone as a Wireless Modem


Use Your Android Phone as a Wireless Modem

Have a laptop but no Wi-Fi? Turn your Android phone into a modem and get your computer connected to the Net in seconds.

You know you can surf the Net on your Android phone--but did you know that the same phone can also enable you to surf the Net from your PC?

We're talking about something called tethering. In a nutshell, tethering allows you to use your smartphone like a wireless modem: You connect it to your computer, then use its 3G connection to get online.
Editor's Note: If you're phone is already running Android 2.2 (as of 7/27/10, its release is limited to the Google Nexus One only), you already have tethering built in to your phone. If you're running 2.1 or lower, read on.

Carrier Considerations

Before you start thinking about tethering with your Android device, you should check with your carrier to learn about its policies and conditions. Some carriers offer their own fee-based tethering services for certain phones; others forbid the practice altogether or assess penalties if they discover you're doing it.
As long as your carrier doesn't object, the only other consideration is data usage. While tethering, you'll be harnessing your phone's 3G connection to use the Internet from a computer, so you will be consuming a potentially sizable chunk of data. If your smartphone plan includes unlimited data, you should be fine; but if your plan allows only a certain amount of data per month, be sure to keep that restriction in mind.

First Steps to Tethering

Carrier-provided options aside, there are numerous ways to tether your phone to your laptop or desktop PC. Many of them require tinkering with advanced configurations on your Android device; we won't be getting into those here. The option we'll be explaining involves little more than installing a couple of programs and clicking on a couple of basic settings.
Let's begin with your mobile phone: Open up the Android Market and search for an app called PdaNet. Download and install it to your phone (it's currently available free of charge).
Once the app is installed, you'll need to download the companion program to your PC. Click over to June Fabrics (that's the name), and select the edition that's right for you. As of this writing, the program supports 32-bit versions of Windows XP, Windows Vista, and Windows 7; 64-bit versions of Windows Vista and Windows 7; and versions 10.5 and 10.6 of Mac OS.
Before you move on to the next step, you need to adjust one setting on your Android phone. From the home screen, tap the Menu key and select Settings. From there, select Applications, and thenDevelopment. Now check the box that says USB debugging. When the confirmation dialog box appears, press OK.
This setting allows the PdaNet app to stream data directly from your phone to your PC. It is a setting frequently used by developers. In theory, however, as the confirmation box explains, it could be used maliciously. For your protection, you should go back into this menu and disable the USB debugging setting whenever you are not actively using the tethering function.

Starting Your Connection

Take a deep breath--you're almost done. Plug your Android phone into an open USB port on your PC. Run the PdaNet app on your phone and select the Enable USB Tether option. The app will confirm that you've downloaded and installed its PC-based cousin; click Already installed to continue.
After verifying the connection, the app will tell you that it's on and running as a background service on your phone. Now, go to your PC and look for the PdaNet icon in your system tray--it's a rectangular box that looks like a cell phone. Right-click the icon and select Connect from the pop-up menu that appears.
At this point, everything should be all set (woo-hoo!). The PdaNet PC program should pop up a confirmation that you're connected, and a notification should appear on your desktop informing you that the PdaNet modem is up and running. Your computer is now online through your phone's data connection; you can open a Web page, check e-mail, and do practically anything else you could normally do while connected to the Net.
One final note: You may have noticed that the PdaNet Android app has a second option on its main screen: Enable Bluetooth DUN. If you're using a computer that has Bluetooth functionality, you can connect your phone to your PC wirelessly using this option instead of the Enable USB Tether option discussed above.

Secure Your Android Phone


Secure Your Android Phone

Protect your Android device--and the data stored on it--with built-in tools and helpful third-party apps.

Whether you paid $500 for your Android phone or got it for a pittance with your new cellular contract, it's a good bet that the data stored on your handset is at least as valuable as the device itself. If your phone is ever lost or stolen, either you'll be glad you took precautions to protect all that data, or you'll sorely wish you had done so. In this article, I'll walk you through setting up Android's built-in security tools and suggest a few third-party extras that add valuable safeguards for your personal information.

Lock Your Phone

Unlike the BlackBerry and other mobile handsets that use alphanumeric passcodes to keep interlopers from messing with your data, Android uses a novel system called an unlock pattern. Rather than punch in a code on a keypad, you swipe your fingertip across the screen in a prespecified pattern, connecting a series of dots along the way. If the pattern you swipe matches the pattern previously entered into the phone's memory, the phone unlocks. If it doesn't unlock, try again.
Like a passcode, the security of an unlock pattern is directly related to the number of data points it contains. Just as a six-digit code is likely to be safer than a four-digit one, a pattern connecting six dots will be harder to break than one with only four dots. (And four dots is the minimum number of points for any unlock pattern.)
To set a passcode in Android, open the Settings menu and tap Location & security. If you haven't set an unlock pattern before, you'll see Set unlock pattern listed under the Screen unlock patternheading. If there's already an unlock pattern in place, it'll say Change unlock pattern. In either case, tap that option to get to the Draw an unlock pattern screen. (If you already have a pattern entered, you'll need to confirm it before creating a new one.)
You can begin drawing your new unlock pattern by touching your finger down on any dot on the screen and then swiping your finger over nearby dots to connect them in any pattern vertically, horizontally, or diagonally. The more dots you connect, the better, and more complex patterns will be more secure than simple patterns. While it may be tempting to, say, connect four dots in a simple L shape, doing so will likely result in your phone being breached by the first interloper to pick it up. Sadly, convenience and security can sometimes be mutually exclusive, and this is definitely one of those cases. If you really want to lock your phone, don't wimp out on the unlock pattern.

Where's Your Phone?

Whether you've let it slip it between the sofa cushions, left it on a restaurant table, dropped it in a busy airport, or had it stolen out of your car, a missing cell phone can be hard to recover. Fortunately, Android's built-in GPS functions can make it easy to find a phone that's gone AWOL--if you're running the right software. The Android Market offers several good apps for tracking down a missing handset.
One of the simplest location trackers for Android is called Where's My Droid. This simple GPS-driven app lets you create a secret "attention word" or passphrase that you can use to trigger a find-me mode on your phone via text message. When your phone goes missing, you'll have two options: Either text your standard attention word to trigger a loud ring that will let you find the phone when you're sure you're within earshot, or text your GPS attention word, and the phone will reply with its exact latitude and longitude so you can drive to its location and pick it up. While this app won't do anything to protect your data from theft, it does make it easy to recover a phone that's simply vanished from sight.

Advanced Security

For more robust security options coupled with the ability to track your phone's whereabouts, two good options stand out. TenCube WaveSecure and Mobile Defense both give you the ability to locate your phone via a secure Web site, so you can not only get the GPS coordinates of your device, but also see that location on a map. And like Where's My Droid, both services let you set off an alarm on your phone that will make it easy to locate if you're within hearing range.
If your phone is truly lost, WaveSecure and Mobile Defense both offer additional tools to help you get your phone back. With each, you can remotely lock or unlock your phone to either prevent thieves from getting at the phone or enable a good Samaritan to get in if so desired. More important, you can use these apps to remotely back up and then wipe all your personal data off the device in the event that nobody turns it in to you--so you can not only get your latest data back, but also protect it from falling into the wrong hands.

File Expert Combines Android Wireless Sharing With a Great File Manager


File Expert Combines Android Wireless Sharing With a Great File Manager

Last week, I looked at a great free app for Android, WiFi File Explorer, which lets you share files between your phone directly over a local Wi-Fi connection. This week, I'm looking at another great app that does all that and more.
File ExpertWhile WiFi File Explorer is awesome for its simplicity,Geek Software's File Expertcombines wireless sharing with an awesome file manager for your phone. Essentially, File Expert is like having WiFi File Explorer and ASTRO File Manager together in one app.
File Expert lets you browse, copy, delete, and move files around on your phone like any other file manager. It includes file viewers for text files and images. But more significantly, it offers wireless sharing similar to that of WiFi File Explorer, but with the added bonus of FTP support. So in addition to making your phone act like a little Web server that you can access from your PC's browser. You can also access it with tools like FileZilla for more robust management. File Expert also includes root support for users who rooted their phones, although this feature is still in development.
File Expert is a genuinely impressive app, though not nearly as mindlessly simple to use as WiFi File Expert. Between the two, if you're looking for foolproof simplicity that requires no thought whatsoever on your part, I'd suggest WiFi File Explorer. But if you want a ton of smart features for greater control over the files on your phone and the connection with your PC, File Expert is very hard to beat.
File Expert is free on Android Market, with no ads.

How to Personalize Your Android Phone


How to Personalize Your Android Phone

Does your Android gadget lack visual flair? Here's how to make your Android handset look cool.

I'll admit it: I think the base version of Google's Android platform is a little rough around the edges--especially when compared with the iPhone, which not only "just works," but is beautiful too.
Sure, Android is cool because it's hackable and open-source: If you're willing and able, you can root your phone and make it look exactly as you want it to. That said, not everyone is comfortable with hacking a phone just to get a pretty interface.
Luckily, you have some easy ways to make your Android device more attractive without hacking it.

Make Your Wallpaper Live

You'll find two types of wallpaper for Android phones: regular, static wallpaper, and dynamic, "live" wallpaper. Live wallpaper is nifty--especially when you're showing off your Android handset to iPhone users--but it can drain your phone's battery and bog down its software.
The key to choosing live wallpaper is to make sure that isn't too animated. Excessive animation not only negatively affects your phone's system, but also makes your phone look cluttered and busy.
Here are a few simple, appealing live wallpapers to get you started.
Nightfall Live wallpaper for AndroidNightfall Live Wallpaper Free 
Developer: Jason Allen
Price: Free
In this wallpaper you get a slowly swirling purple-and-blue night sky, with a silhouette of trees in the foreground. The full version, which costs about $1.50, allows you to change the foreground silhouette and turn the moon and stars on and off.
Shake Them All 
Developer: Yougli
Price: Free
This cute wallpaper uses your phone's accelerometer to propel Android droids across the screen. You can customize everything from the color to how the droids react to things (they can respond to light, music, acceleration, and gravity).
Wave Live wallpaper for AndroidWave Live Wallpaper 
Developer: Crazy Zen Lab
Price: Free
This soothing wallpaper is inspired by the PlayStation 3 and PlayStation Portable background waves. The free version includes 11 colors, three background types, and two touch-point icons, while the full version ($1) gives you more color options and a few other interesting features (such as shaking the phone to change the color).
Best Matrix live wallpaper for AndroidBest Matrix Live Wallpaper 
Developer: A.O.I. Studio
Price: Free
Who doesn't like The Matrix? True nerds (like myself) might notice that the imagery here isn't completely identical to The Matrix's raining code, which uses backward Japanese characters--but it's still pretty cool.
Aurora Live Wallpaper 
Developer: Ketsoyan
Price: Free
This simple, purple-hued wallpaper simulates the Aurora Borealis. Tapping the screen produces bursts of stars.

Use Attractive Widgets

You know those neat widgets that you can place on your phone's home screen? They're Android-only--nothing for iPhone users here. Of course, not all widgets are created equal: While most provide useful information, many are bulky and unattractive.
Here are some widgets for your home screen that are both practical and classy.
SwitchPro widget for AndroidSwitchPro 
Developer: Droid Shogun
Price: $1
This widget remakes your home screen's toggle switches (for turning Bluetooth, Wi-Fi, and the like on and off). Not only are SwitchPro's switches nicer than Android's (and customizable), but you'll also find a lot more of them, including switches for autorotate, vibration/silent mode, and flashlight.
BatteryTime Lite 
Developer: Motalen
Price: Free
BatteryTime Lite is a free battery-monitoring widget/app that puts a small battery icon on your home screen. The widget shows approximately how much charge your phone has left, and you can tap on the widget for more details.
Clockr widget for AndroidClockr 
Developer: Zehro
Price: Free
Clockr is an absolutely gorgeous clock widget. It's not like your regular clock widgets: It's text-based, which means you see the time as, say, "eight fifty seven" instead of "8:57." This simple app is a great way to add a touch of modernity to your home screen. It's customizable, too--it offers multiple ways to display the time, as well as various color combinations.

Text With Style

If you're like me, you text a lot. And let's be serious: The Android texting app just isn't that attractive. Fortunately, some supercharged Android texting apps out there let you do things such as add backgrounds, colors, and even custom LED notification lights to your texts.
These apps don't modify the original texting app--they're separate systems--so unless you enjoy being notified twice about text messages, it's a good idea to turn off your default texting app's notifications.
Here are a couple of texting apps to check out.
Handcent SMS 
Developer: Handcent_admin
Price: Free
Handcent is a customizable texting app that lets you change the look of your texts. Handcent puts texts in bubbles--similar to the iPhone's texting interface--which can be easier to look at. You can tweak the bubbles, text, background, and text-entry box with colors and fonts. Handcent also allows you to change the color of your LED notification light, and it gives you the option of having pop-up notifications when you receive texts.
ChompSMS texting app for AndroidChompSMS 
Developer: ChompSMS
Price: Free
Although ChompSMS is very similar to Handcent, I find it slightly more aesthetically appealing. This app also puts your texts in bubbles, and lets you change the look of your texts with colors and fonts. You can change your notification light color here as well, and choose to receive pop-up notifications when you receive texts. ChompSMS also lets you turn ads off--providing that you donate $6 via PayPal.

Switch Up Your Launcher

If you want to customize more than just your phone's home screen, you might think about downloading a home-screen-replacement app from the Android Market. Such apps let you replace your phone's default launcher with a customized dock, change the way your app drawer works, and make over your phone with custom icons and themes.
ADW.Launcher for AndroidADW.Launcher 
Developer: AnderWeb
Price: Free
ADW.Launcher Is a free app that lets you personalize your home screen and app drawer. It replaces your desktop launcher with a customizable dock, where you can drag and drop apps. It also has options for simplifying the look of your phone: You can hide the notification bar, hide icon labels, and modify the number of rows and columns on the desktop.
Themes for ADW.Launcher are available, too--you can make your own or download premade themes from the Android Market. Themes usually include custom icon packs and custom docks. The paid version, ADWLauncher EX (about $3.30), has even more options.
LauncherPro 
Developer: Federico Carnales
Price: Free
Another home-screen-replacement app that allows you to customize your Android phone, LauncherPro lets you increase the number of home screens (up to seven), hide app drawer apps, and loop your home screen.
LauncherPro also offers themes, icon packs, and a scrollable shortcut dock, as well as an Exposé-like feature that lets you see all of your home screens at once. LauncherPro Plus Unlocker, the paid version of LauncherPro (about $3.50), features exclusive widgets.
Now you have some good ideas for customizing your phone's interface. That said, you don't have to install every single one of these apps right away--play around with styles, colors, and widgets, and see what looks best.

How to Use Google Voice on Your iPhone or Android Smartphone


How to Use Google Voice on Your iPhone or Android Smartphone

Google Voice is an excellent app for streamlining phone calls, sending free text messages, and reading voicemail. Here's how to set it up.

How to Set Up VoIP Apps for Voice and Video Chat on Your Smartphone
Save money and minutes by using your phone's data plan for voice and video chat.
How to Use Google Voice on Your iPhone or Android SmartphoneGoogle Voice allows you to make phone calls using a Google Voice number, as well as to send and receive free text messages, and to manage your voicemail as if it were just another part of your email. If you already have a Google Voice number (or if you would like one), Google Voice is a useful app to own. Here's how to set it up on your smartphone or tablet.

Step 1: Install Google Voice

Google Voice is a free app. Open your device's native app store and search for Google Voice, or go to the appropriate Web-based store page to grab and install Google Voice for Android or Google Voice for iOS.
Google Voice is supported on most Android and iOS devices, including tablets. On Apple devices, Google Voice requires iOS 3.0 or later.

Step 2: Set Up Google Voice

Before you start using Google Voice, you must have a Google Voice number linked to your Google account. To obtain a number, go to the Google Voice page to create one and link it to your Google account.
Android: Once you've installed Google Voice, tap the app to open it. The Welcome screen will tell you a bit about the app. Google Voice lets you replace your default voicemail with Google Voice voicemail, make phone calls using your Google Voice number, and send and receive free text messages through the app.
Press the Next button, and the app will prompt you to sign in to Google Voice via your Google account. Afterward, Google Voice will walk you through the setup process.
First you need to choose whether to make calls using Google Voice. Note, however, that calling with Google Voice isn't the same as calling with other voice chat apps such as Skype. When you make a call through Google Voice, all that really happens is that the party on the other end sees your Google Voice number instead of your mobile phone number. You can elect to use Google Voice for all calls, no calls, or only international calls, or you can instruct Google Voice to ask you each time you make a call.
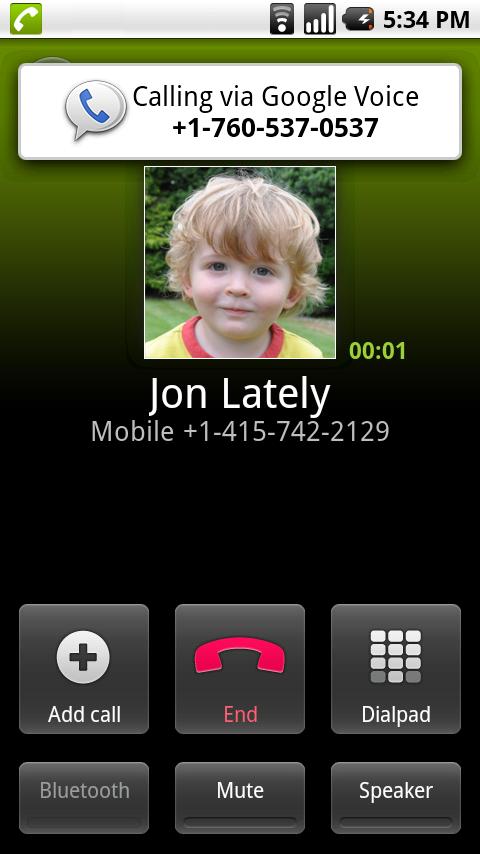
Making a call from the Google Voice Android app.Making a call from the Google Voice Android app.
Next, Google Voice will ask you to set up voicemail. It will prompt you to dial a special number to configure your phone (just click the link, and it will automatically dial); then, you may choose whether to use Google Voice voicemail or your phone carrier's voicemail. The benefit of Google Voice voicemail is that it will provide a transcription (though not necessarily an accurate transcription) of every voicemail you receive. This feature allows you to read through your voicemail instead of listening to it.
If you don't want to set up Google Voice voicemail, you can skip this step.
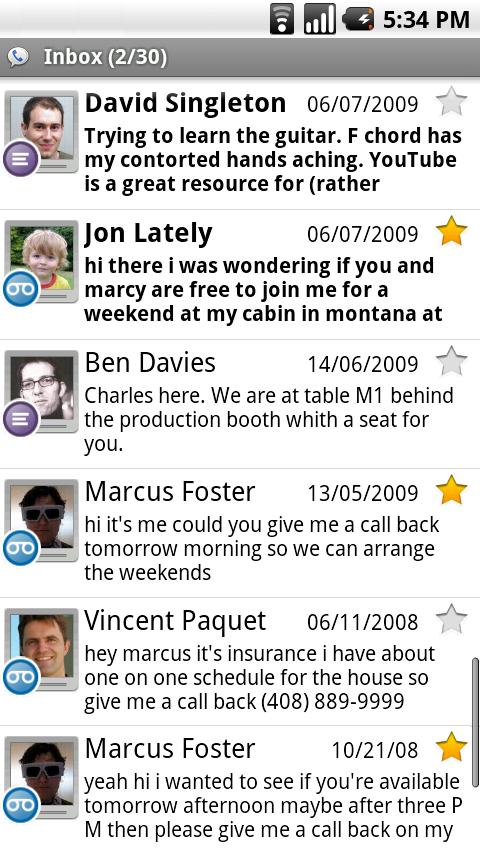
Lastly, the setup process will take you to your Google Voice Inbox. Here you'll see all transcribed voicemail, as well as any text messages sent to your Google Voice number.
The voicemail inbox in Google Voice for Android.Your voicemail inbox in Google Voice for Android.
iOS: Google Voice for iOS is different from Google Voice for Android, because Google Voice is confined to an app in iOS, whereas in Android it's integrated with the entire phone operating system. Once you've installed Google Voice for iOS, tap the app to open it. The app will prompt you to sign in using your Google account.
Signing in to Google Voice from the iPhone app.Signing in to Google Voice from the iPhone app.
Once you've signed in, the app will prompt you to add your phone number to your Google Voice account. If you add your phone number, you will be able to receive Google Voice calls on your mobile device. You may also decline to add a phone number.
The setup process will then take you to your Google Voice inbox, where you'll see all of your Google Voice voicemail and text messages.
You'll find four tabs in the Google Voice iOS app: Inbox, Dialer, Quick Dial, and Settings. You can make phone calls and send text messages using your Google Voice phone number. Phone calls will still count as phone calls on your mobile plan. Text messages, in contrast, will come from your Google Voice account (which is essentially a glorified Gmail account), so they will not count as text messages on your mobile plan.
In the Quick Dial tab, you can add favorite contacts and see recent calls. In the Settings tab, you can add phone numbers to your Google Voice account, add to your Google Voice balance, and turn on Click2Call.
Though Click2Call is a strange feature, it is useful in certain situations. With Click2Call, you can use a Wi-Fi or data connection to initiate phone calls on a nearby phone or computer. Such a function can be handy when you have a non-smartphone (associated with your Google Voice account), an iPod Touch, or an iPad (or an iPhone without a wireless plan), and you want to make a phone call via your Google Voice number. The only way to initiate a phone call from a non-smartphone is to use Click2Call from a smart device.

Using Google Voice

Google Voice is a practical application--if you know how to use it. However, it isn't a free-calling app (though if you use the desktop client, you can make free calls to U.S. numbers); it's just a way of streamlining your phone numbers and voicemail.
Google Voice uses your mobile device's minutes plan to make phone calls (if you don't have a minutes plan, you can't make calls), so it doesn't offer a way around carrier charges. Google Voice is useful if you want to read your voicemail just as you do email, send text messages for free, and consolidate your phone numbers. The ability to call using your Google Voice number is particularly convenient if you are a small-business owner and you don't want to give out your personal number to customers, or if you have multiple phones.

How to Edit Office Documents on Your Tablet


How to Edit Office Documents on Your Tablet


How to Edit Office Documents on Your Tablet
Can a tablet replace your business laptop? Probably, if you're willing to load it up with the right apps. If you’re considering carrying an iPad or Android device around instead of your laptop, you're most likely concerned about sacrificing the functionality of a full PC--especially the office software that allows you to view and edit documents.

Choosing the right tablet for your business needs can be tough; fortunately, no matter what tablet you buy, you can find excellent apps for both iPad and Android that duplicate the functionality of popular document-editing software packages such as Microsoft Office. This guide will help you select an editing app and get started in editing documents on your tablet.
How to Edit Office Documents on Your TabletQuickoffice allows you to choose from many cloud hosting services.
Try the Rest, Then Buy the Best: Quickoffice Pro HD 

Although iPad or Android tablet users can try any of the apps created for phones (check out our guide to editing documents on your smartphone for recommendations), one application is designed with tablets in mind: Quickoffice Pro HD ($20, for Android and iPad). Quickoffice provides a plethora of tools for working with documents, spreadsheets, and presentations, as well as the extraordinarily convenient option to sync documents with cloud hosting services such as Dropbox automatically.
Getting started with these syncing services in Quickoffice is as simple as tapping the '+' icon in the bottom-left corner of the iPad or the '+cloud' icon in the top-right corner of the Android interface, and entering the credentials for the service of your choice. You’ll need to log in only once. After setting up Dropbox or another service, you can browse it from the left-hand menu to find a document to edit, or just create a new document using the '+document' icon in the toolbar. Though the app gives you a choice between Office 97-2003 and Office 2007-10 formats, you should stick to the newer versions (namely, the 2007-10 .docx, .xlsx, and .pptx formats) unless you have some reason not to.
How to Edit Office Documents on Your TabletIn Quickoffice you can automatically share and upload documents to a number of social hosts.
Once you’ve finished editing documents and you're ready to share them, this same interface allows you to send them via email (using the dedicated email button on the toolbar) or upload them to any of several popular social hosts (using the button directly adjacent). This is a great way to work on documents with colleagues who use different platforms (PC/Mac/Linux): You can share documents on a service such as Evernote, collect the edits, and then republish the edited documents in a Microsoft Office-friendly format.

Edits are easy to make, too, because Quickoffice’s text editor is straightforward and uncluttered, with Bold/Italic/Underline, Undo/Redo, Search, Print (using something like Cloud Print for Android), and Formatting options available along the toolbar. You can input, cut, and paste text by tapping or dragging anywhere inside the main interface. If that's too troublesome for you, and you own an Android tablet, consider investing in a good Bluetooth keyboard. Usually you can find a good one for under $50, but be sure to see our guide to Android Bluetooth tablet keyboards for more information and buying advice.
How to Edit Office Documents on Your TabletHere's a look at Quickoffice's document editor, with the formatting menu open in the top-right corner.
The spreadsheet editor is much the same, with an extra option added to the toolbar to insert new rows. You can resize or copy cells by tapping or dragging anywhere within the main interface, just as in the document editor. Clicking within the function bar brings up an elegant function-search wizard that allows you to input Excel-style functions manually, or to choose any of several common functions from a menu.
How to Edit Office Documents on Your TabletThis is Quickoffice's spreadsheet editor, with the formatting menu open.
The presentation editor also has few surprises; the usual text formatting and undo options are right where they always are. In addition, the butterfly menu in the top-right corner allows you to insert text, shapes, or photos into a presentation, and the play icon lets you see your presentation in action. As always, you can drag images around a slide, and you can long-press to cut and paste.

Other Editing Options

A free alternative to Quickoffice on Android is the official Google Docs app. Even though it’s simple enough to use--virtually all of the menu items get you to a list of your online documents, and from there it’s just one more click to Google’s famously bare-bones editor--it doesn’t permit you to work on any documents that you haven’t already uploaded to Google. Neither, unfortunately, does it let you export or email any documents in Word or Excel format, the way that the full desktop interface does; you may only invite other Google users to edit them (via the Invite pop-up menu). For this reason, the Google Docs app is a bit of a niche choice, though if your colleagues are amenable to the Docs interface, it helps that this app is free.
iPad users might wish to use Apple’s own iWork suite of office software, consisting of Pages, Numbers, and Keynote. At $10 each, these apps aren’t cheap (particularly since they lack the Dropbox support of Documents To Go or Quickoffice), but on the roomy screen of the iPad, they’re a great option for working with image-heavy documents, or in other cases where layout is especially important.
No matter what app you choose to use, it's easier than ever to leave your heavy laptop at home and get work done on your tablet anywhere you can access the Internet. Enjoy!

How to Use Your iOS or Android Smartphone or Tablet as a Wireless Network Camera


How to Use Your iOS or Android Smartphone or Tablet as a Wireless Network Camera

Here's how to use the camera in your iPod Touch, iPhone, iPad, or Android smartphone or tablet as a network webcam.

How to Turn Your iOS Gadget Into a Wireless Network Camera With Wireless Camera

GWireless Camera monitoring app; click for full-size image.Launch Wireless Camera and configure the Interval and Maximum Images however you like.ot an extra iOS device that you want to repurpose as a wireless network camera? All you need is the Wireless Camera ($2) app, and you'll be ready to go. Download the app from the App Store and open it on your iOS device. Wireless Camera uses iOS's built-in Web server features to start a website on your local network that you can access by pointing your browser to your gadget's local IP address. (The app will give you that information when you start streaming, so don't worry about finding it yourself.)
Checking surveillance photos; click for full-size image.You can check out the surveillance photos for yourself from the Web interface.Open Wireless Camera and tweak the Interval and Maximum Imagessettings to suit your personal preference (I left them at the default settings); then check Motion Detection and Add Timestamp, and checkEnabled at the top to start the recording. From here, you can position your iOS device wherever you like, and it will begin streaming a video feed that you can access in http://[your device's local IP address]. Wireless Camera will tell you what the IP is when it starts streaming.
Navigate to the Web interface in your browser of choice, and click View Recorded Images to see how your camera is doing. Note that if you want to access your video feed from outside your home network, you'll need to delve into your router's Network Address Translation and port-forwarding features to point incoming traffic toward your iOS gadget. Unfortunately, that operation lies outside the scope of this how-to, and the instructions depend on your network's specific setup.

Use Your Android Smartphone or Tablet as a Wireless Network Camera

Alternatively, you can use a spare Android handset as a wireless network camera, thanks to an app called Motion Detector Pro by MVA. Motion Detector Pro is free in the Android Market, and it's very simple to set up--just download and open the app, and then press anywhere on the startup screen to enter the Setup menu.
From there, you can configure your ideal motion detection threshold, which comes in handy for separating the motion that you want to see (burglars, pets doing cute things, roommates eating your snacks) from the noise (trees, shadows, moths, etc.). You can also specify a phone number or email address to receive the incoming snapshots, but keep in mind that if you use SMS/MMS to send and receive those images, you'll be billed for them per your wireless service plan contract.
Next, press Show advanced settings, and you can configure Motion Detector Pro to start up when you send it a specific text message, define particular zones in your camera feed that you want it to monitor, and turn on a stealth mode that closes the app as soon as the phone is touched.
Once you've finished tweaking the app, activate the motion detection and you're good to go.
Have your own tips or app recommendations? Leave them in the comments!

Thursday, 19 July 2012

Keep Malware Off Your Android Phone: 5 Quick Tips


Keep Malware Off Your Android Phone: 5 Quick Tips

As the list of infected Android apps grows, here is our advice on how to protect your Android smartphone from malware.

Angry DroidImage: Courtesy of I-Enthusiast.comThe number of free Android apps that may be infected with malware this week has increased to more than 50.
Although some of these apps might look suspicious, others bearing names such as "Quick Notes" or "Chess" seem innocent enough, and you might not think twice about downloading them.
Tips for a Malware-Free Smartphone
Following are five quick tips to help you keep your Android handset free of malware.
  1. Always research the publisher of the app. What other apps does it offer? Do any of them look a bit shady? If so, you should probably stay away.
  2. Read online reviews. Android Market reviews may not always be truthful. Check around to see what reputable Websites are saying about the app before you hit the download button.
  3. Always check app permissions. Whenever you download or update an app, you get a list of permissions for it. An alarm clock app, for instance, probably shouldn't need to look through your contacts. The general rule of thumb: If an app is asking for more than what it needs to do its job, you should skip it.
  4. Android MarketAvoid directly installing Android Package files (APKs). When Angry Birds first came to Android, you could get it only through a third party. This is called "sideloading," or installing apps using an .APK file. Although Angry Birds wasn't malware, in general it is highly advisable not to download and install .APK files that you randomly come across. Most of the time you won't know what the file contains until you install it--and by then it's too late.
  5. Put a malware and antivirus scanner on your phone. Although many people still think that antivirus scanners on phones are useless, maybe outbreaks such as this one will change minds. Several different big-name security companies already offer mobile-security options, many of them free. I myself had downloaded "Spider Man," which is on a bad-apps list. My Lookout software identified it as a Trojan horse.

Infected-Apps List Published by Android User 'Myournet'

  • Advanced Currency Converter
  • App Uninstaller
  • Chess
  • Dice Roller
  • Falling Ball Dodge
  • Falling Down
  • Funny Paint
  • Hilton Sex Sound
  • Hot Sexy Videos
  • Photo Editor
  • Scientific Calculator
  • Screaming Sexy Japanese Girls
  • Spider Man
  • Super Guitar Solo
  • Super History Eraser
  • Super Ringtone Maker
  • Super Sex Positions

Infected-Apps List Published by Android User 'Kingmall2010'

  • Advanced App to SD
  • Advanced Barcode Scanner
  • Advanced Compass Leveler
  • Advanced File Manager
  • Best password safe
  • Bowling Time
  • Magic Strobe Light
  • Music Box
  • Sexy Girls: Japanese
  • Sexy Legs
  • Super Stopwatch & Timer
  • Supre Bluetooth Transfer
  • Task Killer Pro

Infected-Apps List Compiled Under the Developer Name 'we20090202'

  • Advanced Sound Manager
  • Basketball Shot Now
  • Bubble Shoot
  • Color Blindness Test
  • Finger Race
  • Funny Face
  • Magic Hypnotic Spiral
  • Omok Five in a Row
  • Piano
  • Quick Delete Contacts
  • Quick Notes
  • Super Sexy Ringtones
  • Tie a Tie
Also on the lists are the foreign-language apps shown at left.
Lookout Mobile Security, which provides security software for mobile phones, posted on its blog a list of 56 Android applications that have been infected with DroidDream, a new type of Android malware that roots your phone and gains access to as much personal information as it can. The apps also can open a backdoor, allowing more executable code to download to your phone without your being aware of it.
A few of these apps have already been downloaded by at least 50,000 users, making this one of the most widespread cases of Android malware to date. Although the apps in question have been pulled from the Android Market, Google is investigating them and has not yet moved to wipe them remotely from users' phones.
Lookout has issued an update to its mobile security software. If you have downloaded any of these apps, the company advises that you run its malware scanner and e-mail the Lookout support center. Mashable (which earlier today posted a list of infected apps complied by Myournet) suggests returning your phone to your carrier, as your data and security may be compromised.
With more and more malware emerging for the Android platform every day, users would do well to be careful and pay strict attention to what happens on their phones. You have to remember that smartphones are essentially computers--and all computers are vulnerable to attack by malicious software.